
KNIME’s Table Creator Node is a quick and easy method to generate an ad-hoc data input. Also, welcome to data warehousing and ETL. ETL stands for extract, transform, and load. You’re going to be pulling data from source systems and pushing the data to target systems after you change the data. You don’t always need to change the data, and you don’t always need access to the actual data.
Welcome to the KNIME Table creator node!
Table creators are very powerful because it allows you to generate data that lives within your KNIME Analytics Platform workflow. Maybe you need a static value, the table creator is the path.
A micro table or set of tables can be used in a data pipeline in most ETL products. I personally enjoy being able to quickly develop a warehouse because I’m not “waiting on a connection to a database.” Let me explain…
Table creator KNIME node allows me to generate a real table, in a few seconds, and it can be then used to simulate the database connection.
When i get connection to the database, I can simply replace the inputs. Remove the table creator and change it to the source system.
Being able to fake it until you make it is really important because often the data is not ready and you’re not going to wait on this data to be ready are you?
The larger the corporation, the longer the process takes to gain access to new data sources or tables, and with the Table Creator Node, I’m able to slip past the usual waterfall method used to manage data related projects.
If you’re at a large organization, ask for a top 1000 records, ask for a sample of the data, and don’t stress having all the data or a perfect data warehouse. Data warehouses change, they often change more when you dealing with dashboards and requirements that shift. If you are working through requirements and needing a lookup table, or table of data is required, the Table creator is a good next step.
IF you need a variable in your workflow, table creator is a great place to hold a variable, and this is where the fun starts in my personal opinion.
The KNIME Table Creator Node is very similar to the Alteryx Desktop Text Input Tool. However the KNIME product is free and alteryx costs $5k annual to have a desktop product. Alteryx forces you to buy a lot of SaaS to scale and be productive, KNIME doesn’t require SaaS purchases to be productive.
The Table Creator node offers a familiar user experience to Alteryx and without very much difference between the two products when it comes to the creation of a table in an ETL application.
Using Table Creator
Using Table Creator is rather straight forward in KNIME Analytics Platform.
Find the Table Creator node in the IO parent category under Other.
You can double click the Table Creator node or drag and drop the node. I prefer wild card searching for Table Creator in KNIME VS trying to find it within the directory paths. Once you found the Table creator node in knime, drag it to your blank screen.
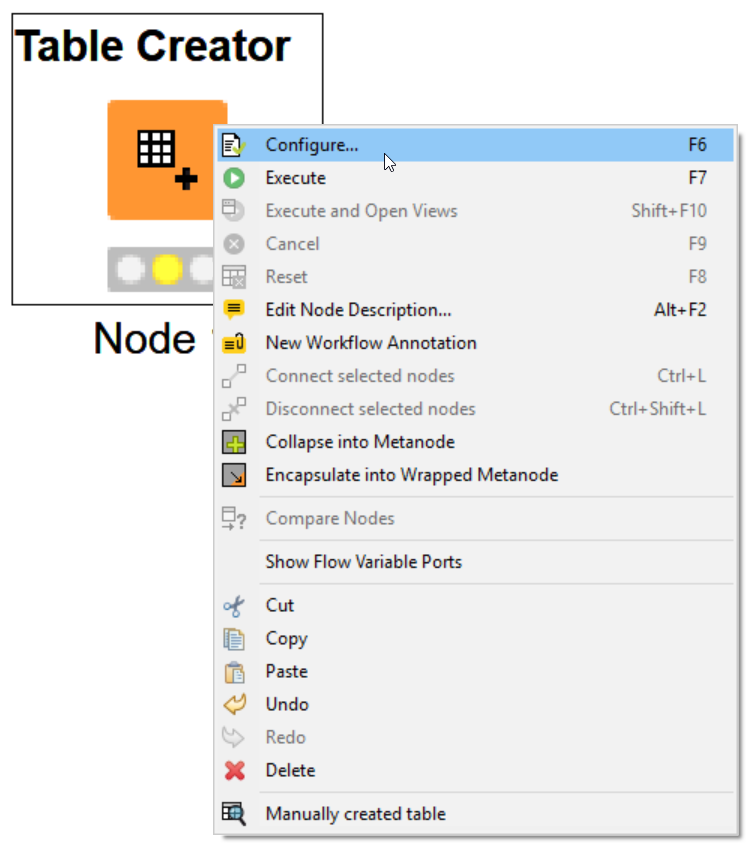
You have the option to right click and open a large menu. Don’t be afraid of the options, read through everything, and let’s focus on the simple configuration setup today!
Next, you can left click configure, similar to above screenshot!
This action will open the Table Creator configuration settings.
(tip) Users often prefer keyboard macros and KNIME Analytics Platform defaults to F6 to configure the tool. (keyboard macros help you scale your time/speed within the product, you can’t scale lots of clicking unless you automate it or figure out a macro!)
My preference is double clicking the node, which will open the configuration for Table creator too! Also, I want to make my own macro’s we can dig into that in a different blog!
Configuring the Table Creator Node
Configuring your Table Creator node is rather painless when using KNIME in a simple method.
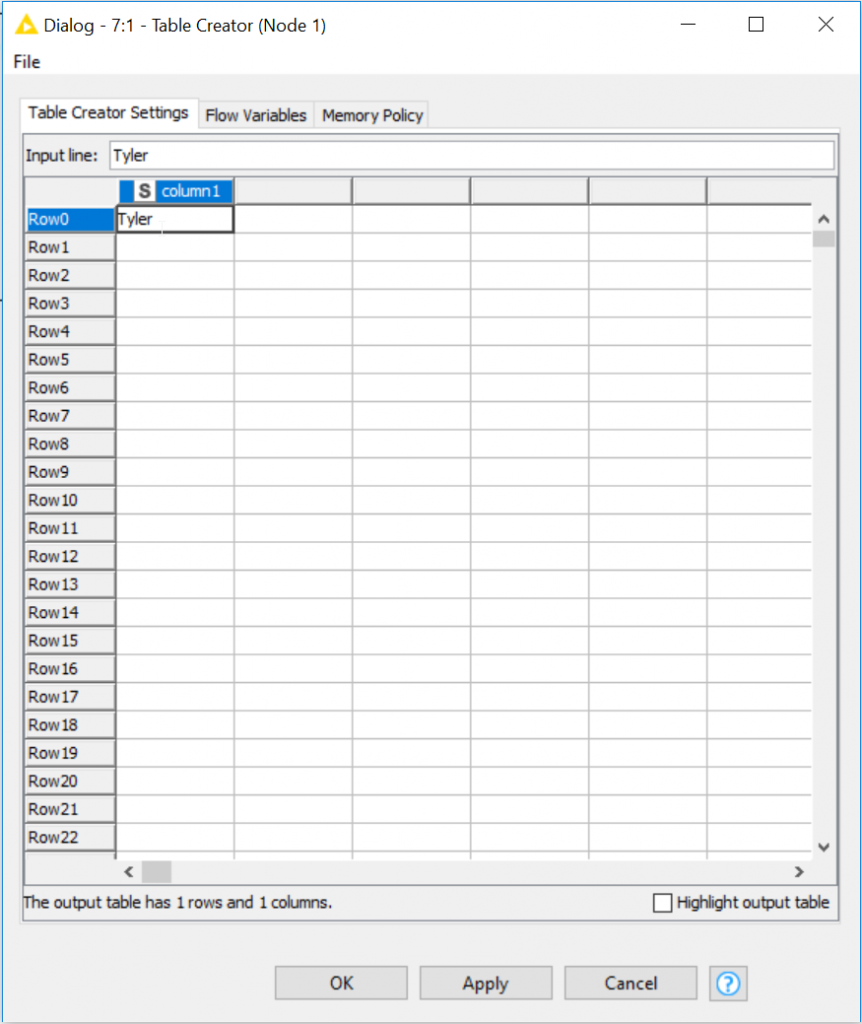
Today, we will add data to our Table Creator Node, start with adding your first name. I’m going to use Tyler.
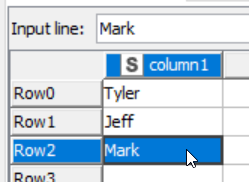
Once you have Tyler, add Jeff, and Mark.
After typing Jeff, press ENTER, to push your typing into ROW2 on column1.
Column1 isn’t the best name for our “name” column.
Let’s change our column header, denoted as an S, which stands for “string” data type.
Double click column header column 1.
New settings will pop up on your screen.
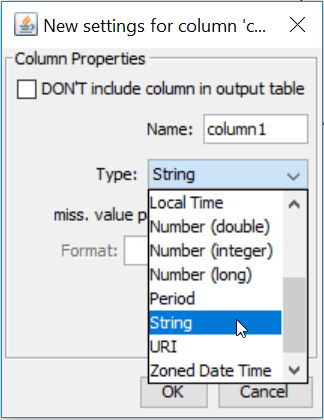
We won’t need to dive into all the technical details today but I want to mention you can add just about every data type you can think of right here.
Changing the Name: from column1 to “FName.”
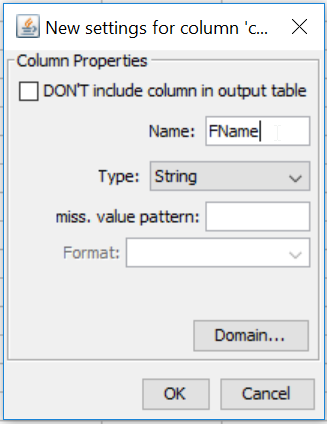
Press OK to close and save your new column settings, and Press OK to close and save your configurations on your Table Creator.
Copy paste works wonders in this node!
Once you have your NODE completed, you can begin adding new tools to transform or analyze your incoming data.
Yes, it’s not a lot of data, it’s not complex because we want to use this lesson as a stepping stone. Automating these tables in the software helps us do a lot of helpful tasks in the future! Also, it’s a good base level, and it helps you build tiny set of data to continue the rest of the lessons.
Continue to the next blog about the KNIME CSV Writer Node.
KNIME explains Table Creator node
KNIME > Node Descriptions > IO > Other (links broken? download knime!)
Allows the manual creation of a data table. The data can entered in a spreadsheet like table.
KNIME – Table Creator – Dialog Options
Column Properties (context menu of the column header)
- Name and type can be changed.
- A pattern can be entered that will cause a missing cell.
- Additionally, possible values of the column domain can be updated by selecting Domain.
- And, you can choose to skip this column entirely, i.e. it will not be included in the output table then.
Row ID Properties (context menu of the row header)
- Use this to change the naming of all row IDs.
- The row IDs are built of a consecutive number with a prefix and a suffix.
- Beside the prefix and suffix you can specify the index of the first row.
KNIME – Table Creator – Ports
Output Ports
| 0 | Manually created table |